Painting projects can often become a source of frustration, especially when it comes to achieving clean lines and avoiding messes. Have you ever wondered why some paint jobs look immaculate, while others seem to bleed and smudge? In this article, we’ll explore additional practical tips for using painter’s tape effectively, ensuring your painting projects look professional every time. From corner applications to protecting your floors, we’ll cover everything you need to know to master the art of painter’s tape.
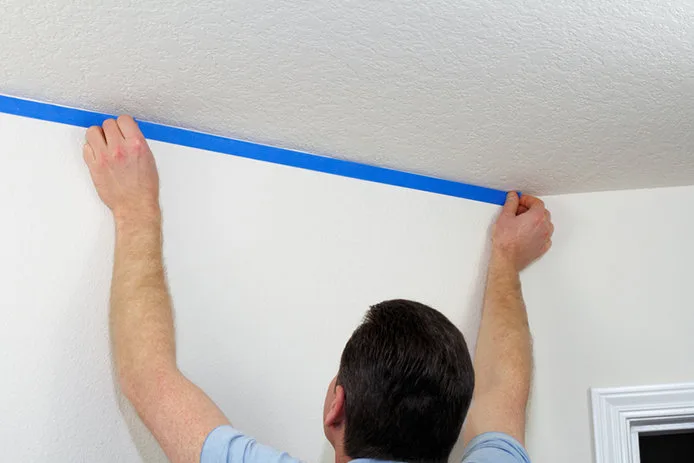
How Do I Apply Painter’s Tape in Corners?
Applying painter’s tape in corners can be tricky, but an effective technique can save you time and frustration. Here’s how to do it:
Step 1: Start with the Baseboard
Begin by running the first piece of painter’s tape along the baseboard of the wall. Position it so that it crosses into the corner and continues up the perpendicular wall. It’s crucial to ensure that the tape adheres properly by pressing it down firmly.
Step 2: Burnish the Tape
Use a putty knife to burnish the tape along its entire length, making sure to eliminate any air bubbles. This step ensures a tight seal, preventing paint from bleeding under the tape.
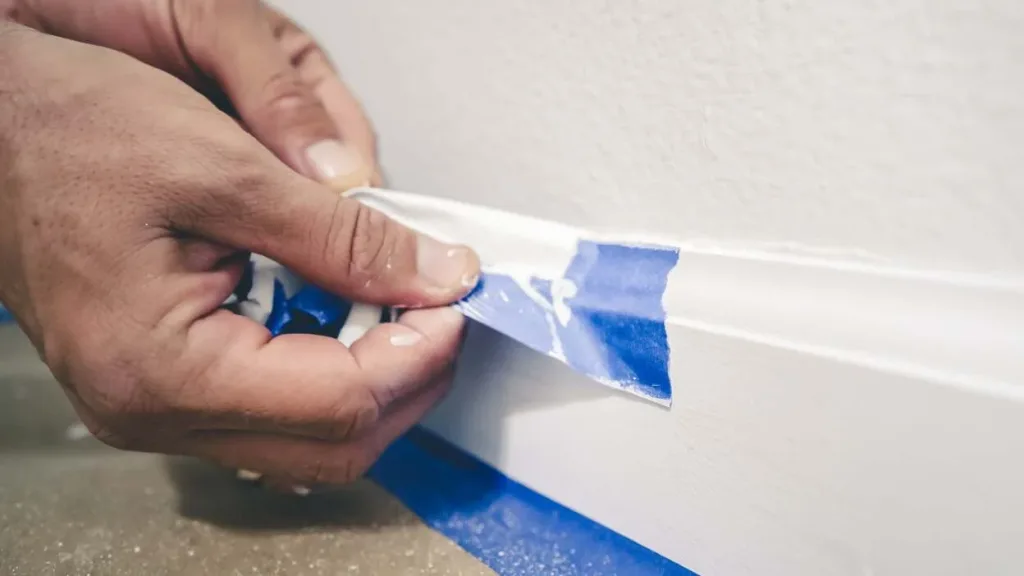
Step 3: Cut Along the Crease
With a sharp utility knife, carefully cut along the crease where the two walls meet. This action will create a clean edge and allow you to remove the excess tape from the wall without damaging the paint beneath.
Step 4: Repeat for the Adjacent Wall
Now, repeat the same process on the adjacent wall. Start about a half-inch away from the corner where your first tape line is. This distance helps maintain a sharp line and prevents the two pieces of tape from overlapping.

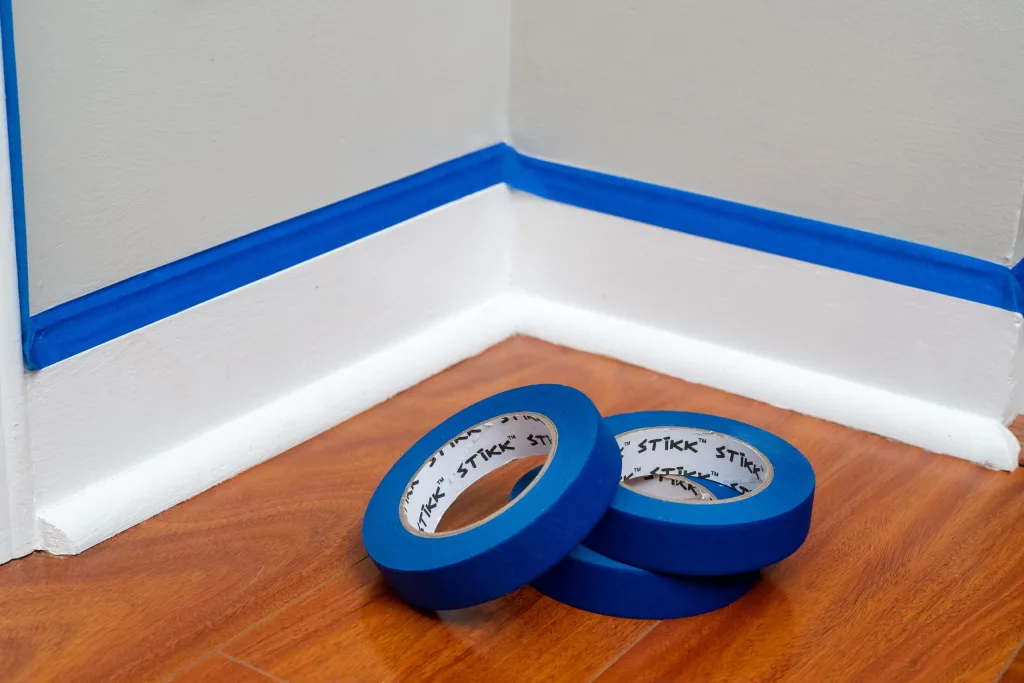
How Do I Protect the Floors When Painting?
Protecting your floors is essential when painting to avoid unsightly spills and stains. Here’s a step-by-step guide to effectively shield your flooring:
Step 1: Cover the Entire Surface
Lay a protective plastic sheet flat over the entire floor area, ensuring it covers from wall to wall. This coverage provides a robust barrier against paint splatter and potential stains.
Step 2: Tape the Edges
If you’re not masking the baseboards, securely tape the edges of the plastic sheet to the floor. Ensure the tape adheres tightly to maintain the protective barrier.
Step 3: Use Masking Film if Needed
If baseboards require masking, apply a masking film over them before taping it to the plastic sheets on the floor. This method provides extra protection for your baseboards from drips.
Step 4: Have Cleaning Supplies Ready
Despite your best efforts, sometimes stray drops of paint can occur. Keep a damp cloth or paper towel close at hand to wipe off spills immediately. This prompt action increases the chances of removing the paint without permanent damage.
No VOCs Paints and Painter’s Tape
The rise of eco-friendly paints has led to significant changes in the painting process. Many new paints now feature lower or zero volatile organic compounds (VOCs). This shift towards non-toxic options has created challenges for both professionals and DIYers.
Understanding the Challenge
Most traditional painter’s tapes have been designed to work with paints that contain standard VOCs. However, the absence of these chemicals in low and zero VOC paints can affect the tape’s performance. Many users find that the tape does not stick well, leading to undesirable results.
Solutions from Manufacturers
Fortunately, innovative manufacturers have stepped in to address this issue. They have developed painter’s tapes specifically formulated to adhere effectively to low and zero VOC paints. These specialized tapes ensure clean removals, easy unwinding, and excellent conformability.
Identifying Quality Painter’s Tape
When selecting painter’s tape for zero VOC projects, look for characteristics like clean removal and ease of application. Trusted brands have invested in technology to maximize performance with these challenging paint formulations.
Related article: Final considerations for using maksing tape during paint jobs.
Can You Apply Painter’s Tape on Windows?
Yes, painter’s tape can be applied to windows! Its light adhesion makes it a practical choice for masking window frames. Here’s how to do it effectively:
Step 1: Start at the Trim
Begin at any corner of the window trim, sticking your painter’s tape where it meets the wall. This positioning sets the stage for an even application.
Step 2: Work in Manageable Segments
Apply the tape in 4- or 5-foot segments to avoid self-adhering challenges. This method maintains control and minimizes mistakes.
Step 3: Press with a Hard Plastic Tool
Use a card or another hard plastic tool to press the tape firmly against the trim. This action prevents paint from seeping under the tape, ensuring clean lines.
Step 4: Mask the Entire Window
Unfold a plastic sheet and position the top edge under the flap of tape along the window’s top. Fold the tape down to secure the plastic sheet, then repeat this process for all sides of the window. This masking method covers the entire surface effectively.
Conclusion
With these practical tips, you can elevate your painting game and achieve stunning results with painter’s tape. Remember that preparation is key — cover floors, apply tape meticulously, and utilize the right products suited for your specific needs. By following these steps, you can create clean lines and protect your surfaces from unwanted spills.
At Fonitaniya Adhesive Tape, we’ve been pioneers in developing innovative adhesive solutions for over 15 years. Our range of painter’s tape and masking tape is designed to meet the demands of both professionals and DIY enthusiasts. Trust our expertise and discover a world of difference in your painting projects.
FAQs
What is painter’s tape used for?
Painter’s tape is used to create clean lines and protect surfaces when painting.
Can I use masking tape instead of painter’s tape?
Masking tape may not provide the same clean results as painter’s tape, especially on delicate surfaces.
How long can I leave painter’s tape on?
It’s best to remove painter’s tape within a day or two to prevent it from sticking too strongly to surfaces.
What is the difference between painter’s tape and masking tape?
Painter’s tape is designed for clean removal and ensuring sharp lines, while masking tape is more general-purpose.
Do I need to prime the surface before applying painter’s tape?
Priming isn’t necessary, but it helps improve paint adhesion and can enhance the final look of your project.