In this article, you will get to know how to properly apply athletic tape on knee, shin, ankle and archilles. But before that, this article will explain why those body parts are vulnerable.
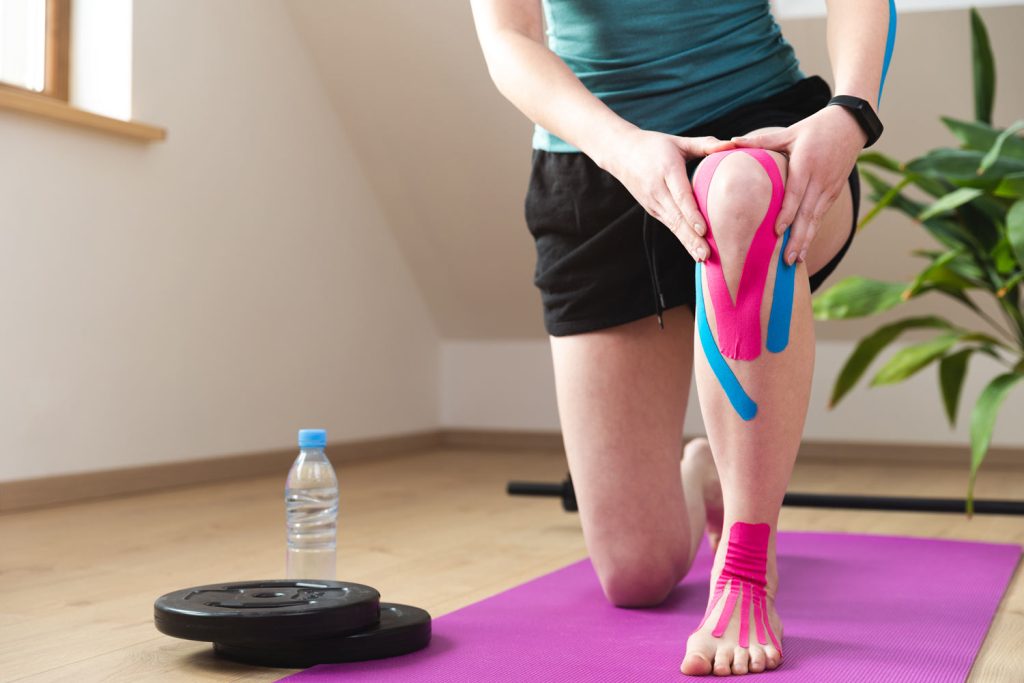
How To Apply Athletic Tape for Knee Pain?
Why Do You Have Knee Pain?
The knee joint is particularly susceptible to injury during most physical activities. Factors like improper posture, excessive weight, sudden movements, or repetitive stress can lead to conditions such as patellar tracking disorder or arthritis, causing significant pain and mobility issues.
Why Does Athletic Tape for Knee Works?
Athletic Tape supports the knee by providing external compression, which helps stabilize the joint and potentially corrects misalignment of the patella. This external support reduces the strain on the knee, allowing inflamed tissues to rest and heal, while also enhancing proprioception (joint position sense) which improves muscular control and coordination.
Taping Instruction:
- Prepare the Skin: Clean and dry the area around the knee to ensure the tape adheres well. Optionally, apply a thin layer of pre-wrap if you have sensitive skin.
- Base Layer: Start with a strip of pre wrap athletic tape for knee or stretchy athletic tape. Position it below the kneecap with no stretch to serve as an anchor.
- Support Strips:
- Cut two strips of tape long enough to reach from above to below the knee.
- Lay one strip over the kneecap, stretching slightly to create a gentle pull. This lifts the patella, reducing pressure on the underlying tissues.
- Apply the second strip in an X pattern over the first to reinforce the lifting effect and stabilize the patella from multiple angles.
- Secure the Edges: Add small strips around the edges if needed, to prevent peeling during movement. Ensure there is no bunching of the skin, which can lead to discomfort and poor circulation.

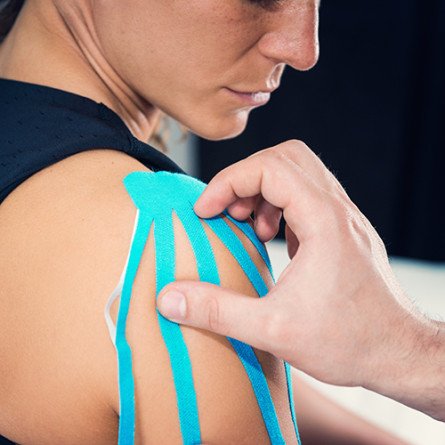
Performance Benefits
Research indicates that taping can significantly alleviate pain and enhance knee stability, making it a favored technique among athletes, particularly those involved in high-impact sports. A 2018 study published in the Sports Health journal reported that athletes experiencing patellar pain saw improvement in performance and reduced pain levels when using kinesiology tape, which shares similar properties with athletic tape.
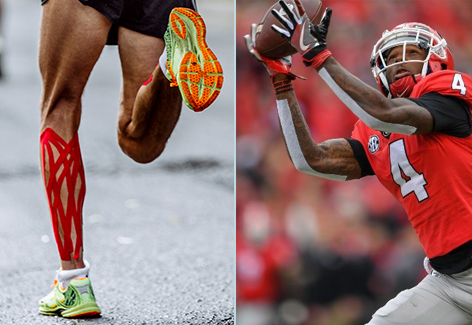
How To Tape Shin Splints with Athletic Tape?
What is Shin Splints?
Shin splints, technically known as medial tibial stress syndrome, typically arise from excessive physical activity, particularly in sports that involve running and jumping. This condition is characterized by pain along the inner edge of the shinbone due to muscle overuse and stress on the shinbone and connective tissues around it.
Why Should We Use Athletic Tape for Shin Splints?
Applying athletic tape can support the lower leg’s musculature, reducing stress on the tibia, and absorbing some of the impact that travels up the leg during activity. Taping also compresses the area, which can reduce swelling and enhance blood flow to promote healing.
Taping Technique: Step-by-Step
- Prepare the Skin: Make sure the shin area is clean and dry. Use pre wrap athletic tape if you have sensitive skin to provide a barrier between the tape and your skin.
- Anchor Strip: Apply a strip of stretchy athletic tape at the base of the shin, just above the ankle, without stretching the tape.
- Support Strips:
- Cut several strips of tape long enough to cover the length of the shin from just above the ankle to just below the knee.
- Place the first strip along the inner edge of the shinbone, applying mild stretch to the tape to provide compression and support.
- Continue placing additional strips overlapping the previous one by about half, covering the entire painful area along the shin.
- Secure the Edges: Add additional small strips at the top and bottom if necessary to secure the ends and ensure the tape stays in place during movement.

Performance Benefits
Athletes who tape their shins may experience reduced pain and enhanced ability to perform, even while recovering from shin splints. Studies, including a 2019 review in the Physical Therapy in Sport, have shown that taping can significantly decrease pain and improve athletic performance during the rehabilitation period.
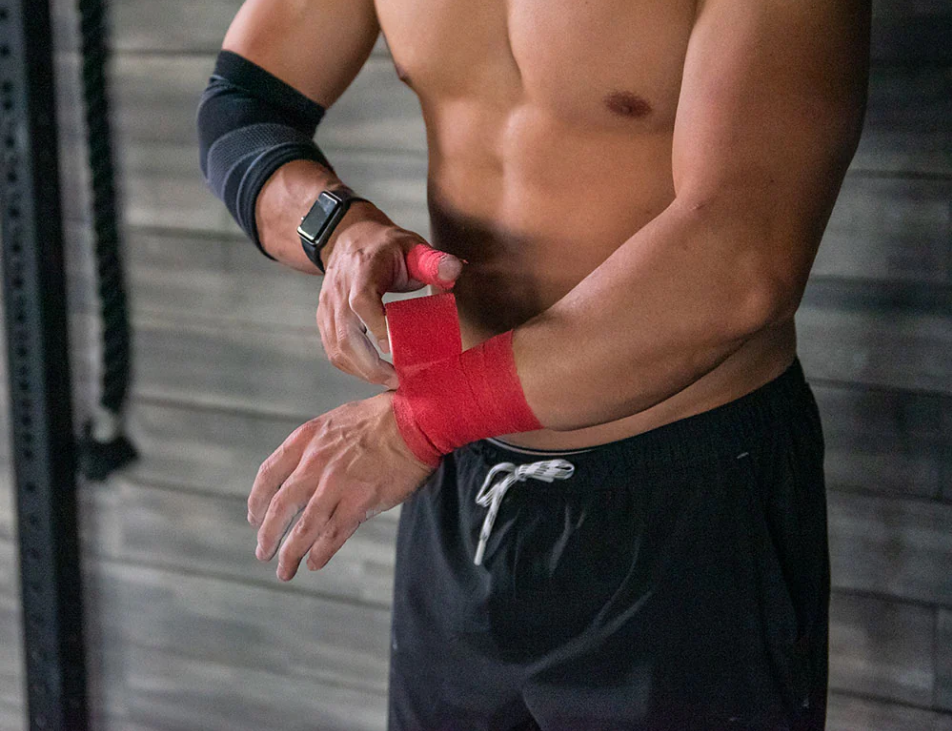
How to Use Athletic Tape on Ankle?
The ankle is highly susceptible to sprains and injuries due to its pivotal role in providing support and balance during walking, running, and jumping activities. These injuries often occur when the ankle rolls, twists, or turns in an awkward manner, stretching or tearing the ligaments.
Why Use Athletic Tape for Ankle?
Athletic tape provides compression and stabilization to the ankle, limiting excessive movement that can lead to further injury. It supports the ankle in a neutral position, reducing the risk of awkward movements while maintaining a functional range of motion.
Taping Technique: Step-by-Step
- Prepare the Skin: Ensure the ankle area is clean and dry to improve tape adhesion. Consider using pre wrap athletic tape for sensitive skin.
- Anchor Strip: Begin by wrapping a strip of stretchy athletic tape around the lower part of the leg, just above the ankle, to serve as a base.
- Support Strips:
- Start the first strip on one side of the ankle, extend it under the heel, and bring it up to the other side. This provides a ‘stirrup’ support, crucial for preventing lateral movements.
- Apply a “figure 8” strip starting from the inside of the lower leg, moving under the foot arch, and crossing up behind the ankle to the other side. Repeat this step to reinforce the stability.
- Additional strips can be applied around the foot and ankle to enhance overall support, overlapping each piece by about half.
- Secure the Edges: Finish with another circular strip around the lower leg to secure all ends and ensure the tape does not peel during activities.

Performance Benefits
Taping the ankle can significantly reduce the risk of re-injury and help athletes maintain performance levels while dealing with mild to moderate ankle issues. A 2016 study in the Journal of Athletic Training reported reduced incidence of ankle injuries in athletes who used prophylactic ankle taping.
How to Tape a Sprained Ankle Using Athletic Tape?
A sprained ankle results from ligaments being stretched beyond their normal range, often due to twisting or rolling the ankle. This common injury varies in severity and can significantly impact mobility.
Why Use Athletic Tape for Sprained Ankle?
Athletic Tape helps stabilize and compress the joint, which supports the healing process by limiting movement, reducing swelling, and preventing further injury. It essentially acts as an external ligament, providing temporary support as the natural ligaments heal.
Taping Technique is Similar to How to Tape an Ankle.
How To Apply Athletic Tape for Achilles Tendonitis?
What is Achilles Tendonitis?
Achilles tendonitis is an inflammation of the Achilles tendon, the band of tissue that connects calf muscles at the back of the lower leg to your heel bone. It’s often caused by repetitive stress to the tendon, making it common among runners and athletes who participate in sports that involve a lot of jumping.
Why Use Athletic Tape for Achilles Tendonitis?
Applying athletic tape provides compression and support, reducing stress on the Achilles tendon during activity. This support can help alleviate pain, control inflammation, and facilitate the healing process by limiting unnecessary movement that could aggravate the condition.
Taping Technique: Step-by-Step
- Prepare the Skin: Ensure the area is clean, dry, and free of oils or lotions. For those with sensitive skin, consider using pre wrap athletic tape.
- Anchor Strip:
- Place an anchor strip around the lower calf, just above the thickest part of the calf muscle, without stretching the tape.
- Support Strips:
- Apply one strip starting from the anchor at the back of the leg, stretching it down to the heel bone. This strip should apply gentle pressure on the Achilles tendon.
- Add a second strip in an overlapping X pattern starting from one side of the anchor, down under the heel, and up to the opposite side of the lower calf anchor to provide lateral support.
- Locking Strips:
- Finish with a few circular strips around the entire lower calf and arch of the foot to secure all ends and ensure the tape maintains its placement during activities.
Performance Benefits
Research, such as that presented in the Journal of Sport Rehabilitation, shows that taping can significantly reduce symptoms associated with Achilles tendonitis, including pain and swelling, thereby improving an athlete’s ability to perform and endure activities without discomfort.
What Precautions Should You Take When Applying Athletic Tape?
Before you start taping, ensure that the skin is clean, dry, and free from oils or lotions to prevent irritation and ensure that the tape sticks properly. Applying tape too tightly can restrict blood flow, leading to numbness or swelling, so it’s important to apply the tape firmly but not too tightly. If you have sensitive skin, consider performing a patch test with the tape on a small area to check for any allergic reactions.

For users with sensitive skin, athletic tape made of silicon can address the problem.
Please replace the tape regularly, typically every 1 to 3 days, depending on the level of activity and the manufacturer’s guidelines, to maintain its effectiveness and hygiene. Each time you change the tape, inspect the skin for any signs of irritation.
When removing the tape, do so gently and slowly, and consider using baby oil or a similar product to soften the tape and minimize skin irritation. After removing the tape, allow the skin time to breathe and recover. This is especially important if you plan to reapply tape. Look for any signs of irritation or damage and treat as needed.
For complex injuries or if you are using athletic tape for the first time, it is advisable to consult with a healthcare professionals. They can provide personalized guidance and prevent injuries from using athletic tape.
How Often Should Athletic Tape Be Changed?
Typically, you should replace athletic tape every one to three days, depending on your activity level and the amount of sweat and moisture exposure. For athletes engaging in daily training or competitions, it may be necessary to change the tape every day to maintain optimal support and hygiene.
Waterproof and sweat-resistant tapes may last longer, but still require regular inspection and replacement to ensure they perform as intended. Always inspect the condition of the tape during and after activity; if it starts to peel off, lose its adhesive properties, or gather dirt and debris, it should be replaced immediately.
However, if you are going through physical therapy or looking for injury prevention, you can use kinesiology tape instead.
To find out the key difference between athletic tape and kinesiology tape, please click the link to read the article.
What Are the Common Mistakes to Avoid While Taping with Athletic Tape?
One of the most frequent errors is applying the tape too tightly, which can restrict blood flow and cause discomfort or even damage to the tissues underneath. The key is to find a balance where the tape is snug enough to support the area without impeding circulation.
Also, incorrect application techniques can also diminish the benefits of taping. For example, not aligning the tape correctly with the muscle or joint it’s meant to support can lead to ineffective stabilization and support.
Conclusion
In conclusion, understanding the correct application and common pitfalls of using athletic tape is crucial for maximizing its benefits, whether you’re an athlete managing injuries or someone seeking additional support during physical activities. At Fonitaniya, we take pride in offering high-quality, reliable athletic tape designed to meet the rigorous demands of various sports and activities.
")
Founded on a commitment to enhancing athletic performance and recovery, Fonitaniya has established itself as a leader in sports medicine products. Our athletic tapes are crafted with superior materials that ensure optimal support and durability. We understand that each athlete’s needs are unique, which is why our tapes are developed to cater to a wide range of requirements, from basic stabilization to advanced joint support.
Our long history in the industry is a testament to our dedication to quality and innovation. We continuously improve our products based on athlete feedback and the latest advancements in sports science, ensuring that our customers receive nothing but the best. Whether you are dealing with a recent injury or looking for preventive measures, Fonitaniya’s athletic tape is a dependable choice that athletes and professionals trust.
FAQs
How long can you keep athletic tape on?
You should change athletic tape every one to three days to maintain effectiveness and skin health.
Can athletic tape get wet?
While some athletic tapes are water-resistant, it’s best to keep them dry for optimal adhesion and support.
Does athletic tape actually work?
Yes, athletic tape provides support, reduces pain, and stabilizes muscles and joints during physical activity.
Is it OK to sleep with athletic tape on?
Generally, you should not sleep with athletic tape on unless recommended by a healthcare professional for specific injuries.
How do you apply athletic tape to your ankle?
Start with a clean and dry ankle, apply an anchor strip, then layer the tape from the inner ankle across the foot and up the other side.
What does taping your muscles do?
Taping your muscles supports them, limits harmful motion, enhances circulation, and can speed up recovery from injuries.
Can you wear athletic tape all day?
Yes, you can wear athletic tape all day during activities, but you should remove and reapply it daily to prevent skin irritation.